This article is providing an information on how to enable ping request from other machines on the network by adding inbound rule on firewall on Windows 7 and later and Windows Server 2008 and later.
Prerequisite
Network setting should done and confirm if you can access Internet or view other machines on the network your machine is on.
Symptom
You get the "Request timed out." message when pinging to other machine on the network.

How-To
Open a Windows firewall with advanced security.

Select Inbound rules on left panel
Click on new rule on the right panel

Select Custom rule type.


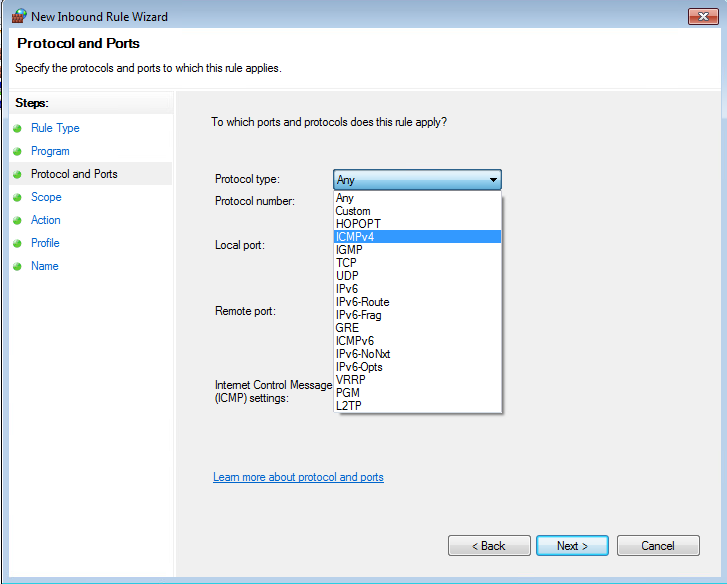
Choose ICMPv4 for ping over IPv4.


On the Action page, select Allow the connection, and then click Next.
On the Profile page, select the network location types to which this rule applies, and then click Next

On the Name page, type a name and description for your rule, and then click Finish.

To verify open CMD and pinging.

Done.
To disable this rule, select rule you want to disable and click on "Disable rule".

Reference
Prerequisite
Network setting should done and confirm if you can access Internet or view other machines on the network your machine is on.
Symptom
You get the "Request timed out." message when pinging to other machine on the network.

How-To
Open a Windows firewall with advanced security.

Select Inbound rules on left panel
Click on new rule on the right panel

Select Custom rule type.


In the Customize ICMP Settings dialog box, do one of the following:
- To allow all ICMP network traffic, click All ICMP types, and then click OK.
- To select one of the predefined ICMP types, click Specific ICMP types, and then select each type in the list that you want to allow. Click OK.
- To select an ICMP type that does not appear in the list, click Specific ICMP types, select the Type number from the list, select the Code number from the list, click Add, and then select the newly created entry from the list. Click OK
Choose ICMPv4 for ping over IPv4.


On the Scope page, you can specify that the rule applies only to network traffic to or from the IP addresses entered on this page. Configure as appropriate for your design, and then click Next.

On the Action page, select Allow the connection, and then click Next.
On the Profile page, select the network location types to which this rule applies, and then click Next

On the Name page, type a name and description for your rule, and then click Finish.

To verify open CMD and pinging.

Done.
To disable this rule, select rule you want to disable and click on "Disable rule".

Reference
Comments
Post a Comment